博客第一篇,第一版,vue+node+mysql搭建个人博客,后mysql数据库更换为mongodb,页面布局样式重新设计。
快速搭建 node 后端服务 Github-quick-node-server
准备工作
安装node,这是必须的
新版node自带npm,安装Node.js时会一起安装,npm的作用就是对Node.js依赖的包进行管理,也可以理解为用来安装/卸载Node.js需要装的东西。
验证是否安装成功: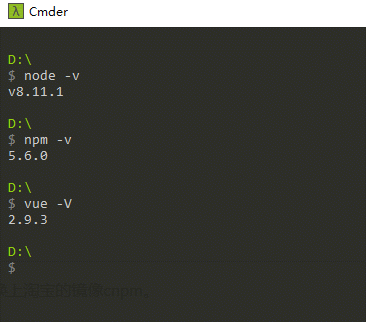
推荐windows下终端工具:cmder
npm安装vue-cli
使用npm下载依赖包是可能有些慢,所以这里可以换上淘宝的镜像cnpm。
打开终端(可以在任何位置),输入npm install cnpm -g --registry=https://registry.npm.taobao.org
cnpm跟npm用法完全一致,只是在执行命令时将npm改为cnpm。
现在来安装vue-cli:输入npm install -g vue-cli 或者 cnpm install -g vue-cli
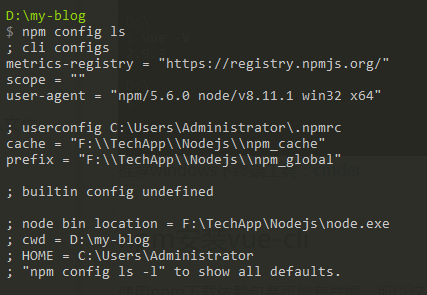
命令中 -g 表示全局安装,会安装到node安装目录下的node_modules文件夹下,看看里面是不是多了vue-cli文件夹,如果没有,看看npm模块的安装路径
npm config ls
可以查看模块的安装路径 prefix,具体设置请自行百度。
vue-cli快速构建项目
- 选定一个你喜欢的文件夹,进入该文件夹下,之后创建的项目目录就在文件夹下
- 打开终端,进入目标文件夹,以 D:\ 为例,使用webpack模板构建项目,输入
vue init webpack my-blog
此时会自动从github下载文件目录到目标文件夹,上不了github的只能想办法了,从别处把构建好的文件全部拷过来也是可以的。
运行项目
1、进入my-blog文件夹,首先可以看到文件夹下有一个package.json文件,这个文件很重要,里面记录的项目的一些信息和运行成功运行项目必须的一些依赖包,之后安装的一些包也要记录到里面,方便别人拷贝过来你的项目时安装依赖,顺利运行。
2、新版本的 vue-cli 在执行
vue init webpack my-blog第9步时会有一个选择: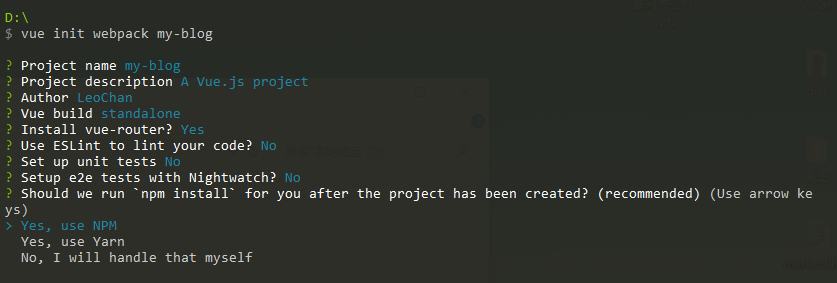
如果选择了Yes,则可跳过步骤3,如果选择了No,则按照步骤3进入文件夹安装依赖。3、终端输入(要在此文件夹下)输入:
cnpm installinstall可以简写为 i 即cnpm i,cnpm安装应该挺快的,安装完成后会看到文件夹下多了个node_modules文件夹,里面就是运行项目所需要的一些依赖包,可以看到此文件夹虽然不大,但是里面文件个数有上千个,所以拷贝起来也是挺麻烦的,所以把依赖包记录到package.json里面,别人只要重新下载安装一下就好了,上传到github上也方便。4、启动项目:输入
npm run dev,等待浏览器自动打开。
npm run dev 执行的命令即是package.json里 scripts下的dev:node build/dev-server.js"scripts": { "dev": "webpack-dev-server --inline --progress --config build/webpack.dev.conf.js", "start": "npm run dev", "build": "node build/build.js" },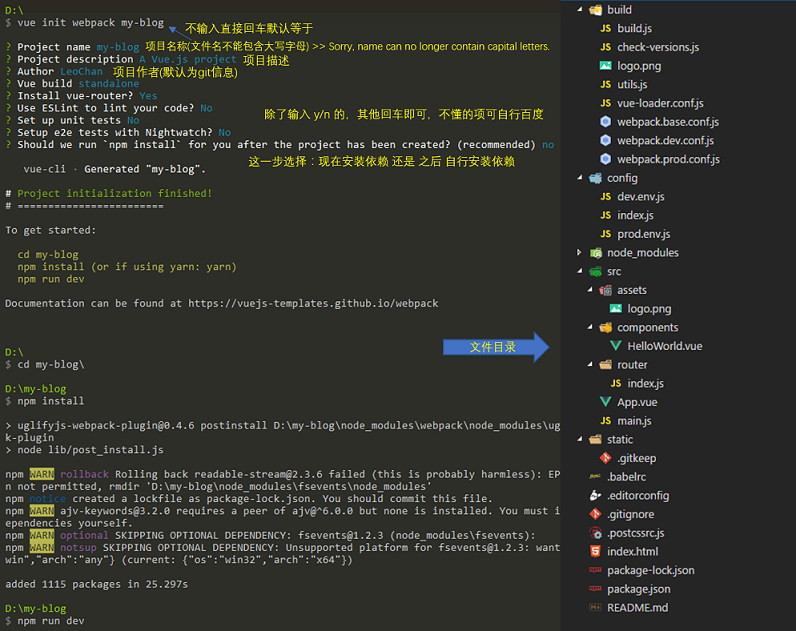
默认端口为8080,若此时8080端口被占用则会出错
...
> Starting dev server...
events.js:160
throw er; // Unhandled 'error' event
      ^
Error: listen EADDRINUSE :::8080
.....
可以在D:\my-blog\config\index.js里修改端口
dev: {

    // Paths
    assetsSubDirectory: 'static',
    assetsPublicPath: '/',
    proxyTable: {},

    // Various Dev Server settings
    host: 'localhost', // can be overwritten by process.env.HOST
    port: 8080, // can be overwritten by process.env.PORT, if port is in use, a free one will be determined
    autoOpenBrowser: false,
    errorOverlay: true,
    notifyOnErrors: true,
    poll: false, // https://webpack.js.org/configuration/dev-server/#devserver-watchoptions-

    // https://webpack.js.org/configuration/devtool/#development
    devtool: 'cheap-module-eval-source-map',

    // If you have problems debugging vue-files in devtools,
    // set this to false - it *may* help
    // https://vue-loader.vuejs.org/en/options.html#cachebusting
    cacheBusting: true,

    cssSourceMap: true
  },
启动成功后:
...
DONE  Compiled successfully in 2597ms
I  Your application is running here: http://localhost:8080
安装需要用到的包
首先安装项目要用到的一些组件,也可以之后遇到什么需要的再安装
- element-ui:饿了么前段组件库,可以帮助快速建立起前段页面,少些很多样式
- vuex:vue状态管理
- axios:基于Promise 用于浏览器和 nodejs 的 HTTP 客户端
- mysql:连接mysql数据库
- express:
- body-parser:
- node-sass:sass-loader依赖
- sass-loader:解析sass/scss文件
可以依次安装( npm 安装很慢的可以使用 cnpm ):
npm install element-ui --save  (回车)
npm install vuex --save  (回车)
npm install axios --save  (回车)
npm install mysql --save  (回车)
npm install express --save  (回车)
npm install body-parser --save  (回车)
npm install node-sass --save-dev  (回车)
npm install sass-loader --save-dev  (回车)
也可以一起安装:
npm install element-ui vuex axios mysql express body-parser --save  (回车)
npm install node-sass sass-loader --save-dev  (回车)
--save 意思就是将依赖记录在 package.json 里的 dependencies 下,之后生产环境也是需要这些包的,--sava-dev 是将依赖记录在 package.json 里的 devDependencies 下,只是开发环境需要这些包,方便开发调试,而生产环境不需要。(-S 是 --save 的缩写,-D 是 --save-dev 的缩写)
  "dependencies": {
    "axios": "^0.18.0",
    "body-parser": "^1.18.3",
    "element-ui": "^2.3.9",
    "express": "^4.16.3",
    "mysql": "^2.15.0",
    "vue": "^2.5.2",  // 项目构建完就有了
    "vue-router": "^3.0.1",  // 项目构建完就有了 当时"Install vue-router"选了Yes
    "vuex": "^3.0.1"
  },
  "devDependencies": {
    ...
    "node-sass": "^4.9.0",
    "sass-loader": "^7.0.1",
    ...
  },
使用scss/sass前必须先安装node-sass、sass-loader,否则运行npm run dev时会报错
<style lang="scss" scoped>
  $bgColor: #F90;
  .blog-home {
    background: $bgColor
  }
</style>
调用后台接口 ajax 请求数据
1、打开入口js文件main.js,引入element-ui组件来搭建页面 element-ui 查看官网文档。
// The Vue build version to load with the `import` command
// (runtime-only or standalone) has been set in webpack.base.conf with an alias.
import Vue from 'vue'
import App from './App'
import router from './router'
import axios from 'axios'
import ElementUI from 'element-ui'
import 'element-ui/lib/theme-chalk/index.css'

Vue.config.productionTip = false
Vue.use(ElementUI);
Vue.prototype.$http = axios;

/* eslint-disable no-new */
new Vue({
  el: '#app',
  router,
  components: { App },
  template: '<App/>'
})
其中 axios 用来完成 ajax 请求,
import axios from 'axios'
axios.get('/', function() {});
axios.post('/', function() {});

// 将 axios 添加的 Vue 原型上后就不需要再在每个需要使用它的页面引入了
Vue.prototype.$http = axios;
$http.get('/', function() {});
$http.post('/', function() {});
2、每个页面都相当于一个组件,文件以.vue结尾,第一次启动成功时看到的页面就是组件Hello.vue,路径src/components/Hello.vue。路由地址在 src/router/index.js 中配置,打开修改我们待会自己要用的:
import Vue from 'vue'
import Router from 'vue-router'
import HelloWorld from '@/components/HelloWorld'
import Home from '@/components/pages/Home'
import Blog from '@/components/pages/Blog'

Vue.use(Router)

export default new Router({
  routes: [
    // {
    //   path: '/',
    //   name: 'HelloWorld',
    //   component: HelloWorld
    // },
    {
      path: '/', // http://localhost:8080/#/
      name: 'Home',
      component: Home
    },
    {
      path: '/blog', // http://localhost:8080/#/blog
      name: 'Blog',
      component: Blog
    }
  ]
})
上面引入了三个组件HelloWorld.vue(默认),Home.vue,Blog.vue。 path是页面地址,name可以随便写,component 是 import 的组件名。
3、在 scr/components 下新建文件夹 pages,在 pages 下新建文件 Home.vue,Blog.vue,里面按规则要求写好内容,运行工程打开页面 http://localhost:8080/#/、http://localhost:8080/#/blog 即可看到相应的内容。 在 Blog.vue 中输入下面内容用来后面测试调用接口
<template>
  <div class="">
    <el-button type="primary" @click="getArticle">调用后台接口</el-button>
    <el-input v-model="inpContent"></el-input>
  </div>
</template>

<script>
export default {
  name: 'blog',
  data() {
    return {
      inpContent: 'Blog'
    }
  },
  methods: {
    getArticle() {
      this.$http.get('/api/getArticle')
        .then( (res) => {
          console.log('res', res);
          this.inpContent = res.data.data;
        })
    }
  }
}
</script>
4、后端使用Express做服务端提供数据接口,不了解的可以先去官网文档大致了解一下 Express官网,在根目录my-blog下创建文件夹server用来存放后端数据库配置数据和相关方法api。
server文件夹下创建文件:index.js
const path = require('path');
const express = require('express');
const app = express();

app.get('/api/getArticle', (req, res, next) => {
  res.json({
      data: '后台返回结果 getArticle'
    })
})

// 监听端口
app.listen(3000);
console.log('success listen at port:3000......');
另开一个 CMD 窗口,进入目录 D:\my-blog\server
D:\my-blog\server
$ node index.js
success listen at port:3000......
5、打开 http://localhost:8080/#/blog 点击按钮"调用后台接口",会发现控制台报错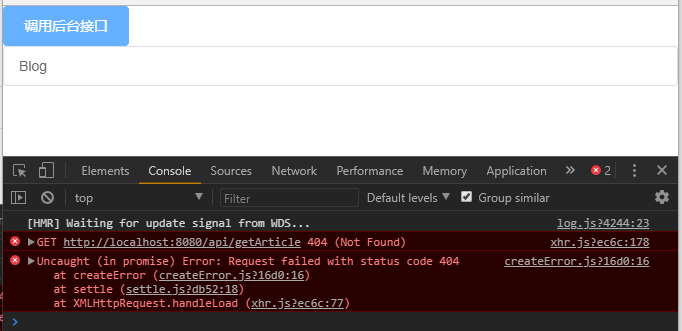
这是因为我们工程运行的端口是8080,而后端程序运行的端口是3000,所以是跨域请求,要想请求成功,就要先在配置里设置一下代理
6、打开文件 /config/index.js,将 proxyTable 项设置如下
proxyTable: {
  '/api': {
    target: 'http://localhost:3000/api',
    changeOrigin: true,
    pathRewrite: {
      '^/api': ''
    }
  }
}
'/api': 表示所有以 /api 为开头的请求,如我们的请求 this.$http.get('/api/getArticle')
target: 将所有以 /api 为开头请求转发到 http://localhost:3000/api
changeOrigin: true/false, Default: false,本地会虚拟一个服务端接收你的请求并代你发送该请求(不太明白,false 试了也可以)
pathRewrite: 重写地址。 '^/api': '' 表示将以 /api 开头的请求的地址中的 '/api' 替换为 '',
即 path = path.replace(/^/api/, '')
eg: this.$http.get('/api/getArticle')
path = '/api/getArticle'
path = path.replace(/^/api/, '') = '/getArticle'
这样目标请求就变成了 http://localhost:3000/api/getArticle , 如果不写 pathRewrite, 请求则为 http://localhost:3000/api/api/getArticle 所以也可以这样proxyTable: { '/api': { target: 'http://localhost:3000', changeOrigin: true, } }最后请求同样转发为 http://localhost:3000/api/getArticle , 总之要和后台的接口路径对应上,不过还是建议加上 pathRewrite,方便同类方法调用
// server/index.js
const path = require('path');
const express = require('express');
const router = express.Router();
const app = express();

app.use('/add', router);
app.use('/del', router);

router.get('/getArticle1', (req, res, next) => {
  api.getArticle(req, res, next);
})
router.get('/getArticle2', (req, res, next) => {
  api.getArticle(req, res, next);
})

router.get('/delArticle1', (req, res, next) => {
  api.getArticle(req, res, next);
})
router.get('/delArticle2', (req, res, next) => {
  api.getArticle(req, res, next);
})

// 监听端口
app.listen(3000);
console.log('success listen at port:3000......');

> connetion.query(sql, [1, "blog"], () => )
var getValue = function() {
pool.getConnection((err, connection) => {
var sql = 'SELECT * FROM test WHERE id = ?'
connection.query(sql, [1], (err, result) => {
    console.log(result);
    connection.release();
})
})
}
getValue();
/* $ node db.js [ RowDataPacket { id: '1', name: 'blog' } ] */
// 更新数据 var updValue = function() { pool.getConnection((err, connection) => { var sql = 'UPDATE test SET name = ? WHERE id = ?' connection.query(sql, [22, 1], (err, result) => { console.log(result); connection.release(); }) }) } updValue();
// 删除数据 var delValue = function() { pool.getConnection((err, connection) => { var sql = 'DELETE FROM test WHERE id = ?' connection.query(sql, [1], (err, result) => { console.log(result); connection.release(); }) }) } delValue();
结合前面的 ajax 请求数据,我们便可以轻松的对数据库中的数据进行操作了,下面来模块化这些操作。

### 模块化后端代码

在 /server 下创建文件

- db.js 数据库连接配置
- api.js 连接数据库,各种方法实现
- sqlMap.js sql语句
- router.js 后端 express 路由配置
- index.js 后端入口文件,启动后端服务

1、db.js

```js
// 数据库连接配置
module.exports = {
  mysql: {
    host: 'localhost',  // 新建数据库连接时的 主机名或ID地址 内容
    user: 'root',
    password: '8023', // root 密码
    database: 'myBlog', // 数据库名
    port: '3306'
  }
}
2、api.js
const mysql = require('mysql');
const dbConfig = require('./db');
const sqlMap = require('./sqlMap');

const pool = mysql.createPool({
  host: dbConfig.mysql.host,
  user: dbConfig.mysql.user,
  password: dbConfig.mysql.password,
  database: dbConfig.mysql.database,
  port: dbConfig.mysql.port,
  multipleStatements: true    // 多语句查询
});

module.exports = {
  getValue(req, res, next) {
    var id = req.query.id;
    pool.getConnection((err, connection) => {
      var sql = sqlMap.getValue;
      connection.query(sql, [id], (err, result) => {
          res.json(result);
          connection.release();
      })
    })
  },
  setValue(req, res, next) {
    console.log(req.body);
    var id = req.body.id, name = req.body.name;
    pool.getConnection((err, connection) => {
      var sql = sqlMap.setValue;
      connection.query(sql, [name, id], (err, result) => {
          res.json(result);
          connection.release();
      })
    })
  }
}
3、sqlMap.js
var sqlMap = {
  getValue: 'SELECT * FROM test WHERE id = ?',
  setValue: 'UPDATE test SET name = ? WHERE id = ?'
}

module.exports = sqlMap;
4、router.js
const express = require('express');
const router = express.Router();
const api = require('./api');

router.get('/getValue', (req, res, next) => {
  api.getValue(req, res, next);
});

router.post('/setValue', (req, res, next) => {
  api.setValue(req, res, next);
});

module.exports = router;
5、index.js
const routerApi = require('./router');
const bodyParser = require('body-parser'); // post 数据是需要
const express = require('express');
const app = express();

app.use(bodyParser.json());

// 后端api路由
app.use('/api', routerApi);

// 监听端口
app.listen(3000);
console.log('success listen at port:3000......');
在 /scr/components/pages/Blog.vue 文件中写入下面代码测试
<template>
  <div class="">
    <el-input v-model="inpContent"></el-input>
    <el-button type="primary" @click="getValue">获取数据</el-button>
    <el-button type="primary" @click="setValue">添加数据</el-button>
  </div>
</template>

<script>
export default {
  name: 'blog',
  data() {
    return {
      inpContent: ''
    }
  },
  methods: {
    getValue() {
      // axios.get('/', {params: ''})
      this.$http.get('/api/getValue', {
        params: {id: 1}
      }).then( (res) => {
        console.log('res', res);
        this.inpContent = res.data[0].name;
      })
    },
    setValue() {
      // axios.post('/', {})
      this.$http.post('/api/setValue', {
        id: 1, name: this.inpContent
      }).then( (res) => {
        console.log('res', res);
      })
    }
  }
}
</script>
- get:第二个参数(可选)是一个对象,以 params 为属性,将条件数据传到后台,后台通过 req.query 可以获得 params 对应的值
- post:第二个参数(可选)也是一个对象,属性任意,将提交数据传到后台,后台通过 req.body 可以获得这个对象,req.body 数据的解析需要用到包 body-parser,在 index.js 中引入 use 即可。
打开两个命令窗口分别运行工程,运行后端服务,即可进行测试:
D:\my-blog
$ npm run dev
D:\my-blog\server
$ node index.js